Construction - from paper to screen - Exhibition 2014
Introduction
A week ago all the groups in the class presented their ideas for both branding of the exhibition and for the design of the exhibition space. After a few days a concept was chosen by the lecturer and the administration of the institute. A concept for the exhibition space provided to us was also chosen by the class.
Once all concepts were confirmed, this lead to the next step in the process of building this exhibition. The whole class, all 42 students, had to be divided into smaller groups and take on a particular area.
These are:
INTERACTIVE
DESIGN & PRINT
MANAGEMENT
CONSTRUCTION
WAY FINDING
DOCUMENTATION
PROJECTION
PROMOTION
The group I joined was the construction group as this was always something that I liked to do, and also, in my opinion, have some good experience when it comes to this area.
The construction group is made up of six students and me. Together we started discussing and designing a concept for the room and how it should look. After each member gave their ideas and how we can work around the room to fit each student into the space provided, we came up with a concept that was feasible.
Designing & building the exhibition space
Design
In the images below one can see the style that was designed for the space provided to us. These ideas were discussed as a group and the finalised below was completed by Steve, to which each member agreed. The sketch below shows how the structure would hold the monitors and thus each monitor will be incorporated into the actual structure.
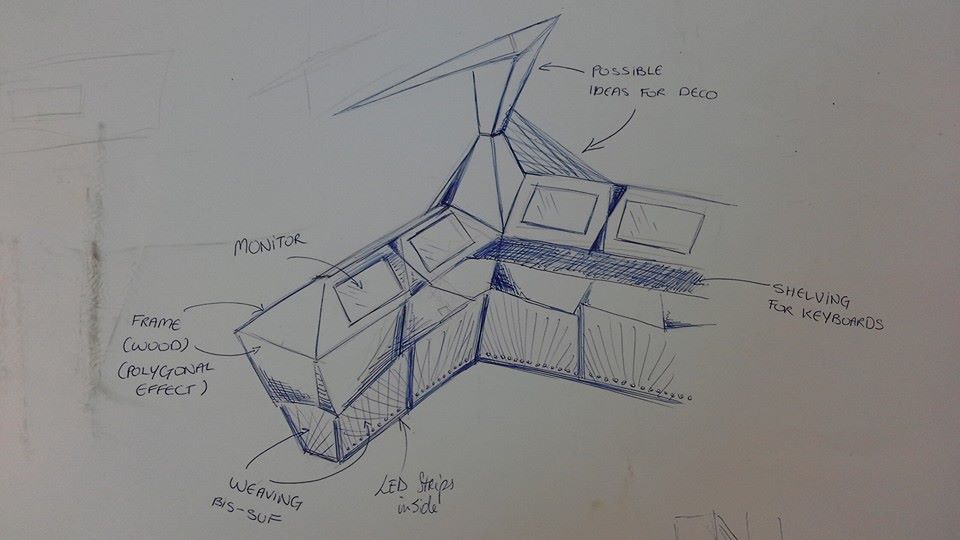
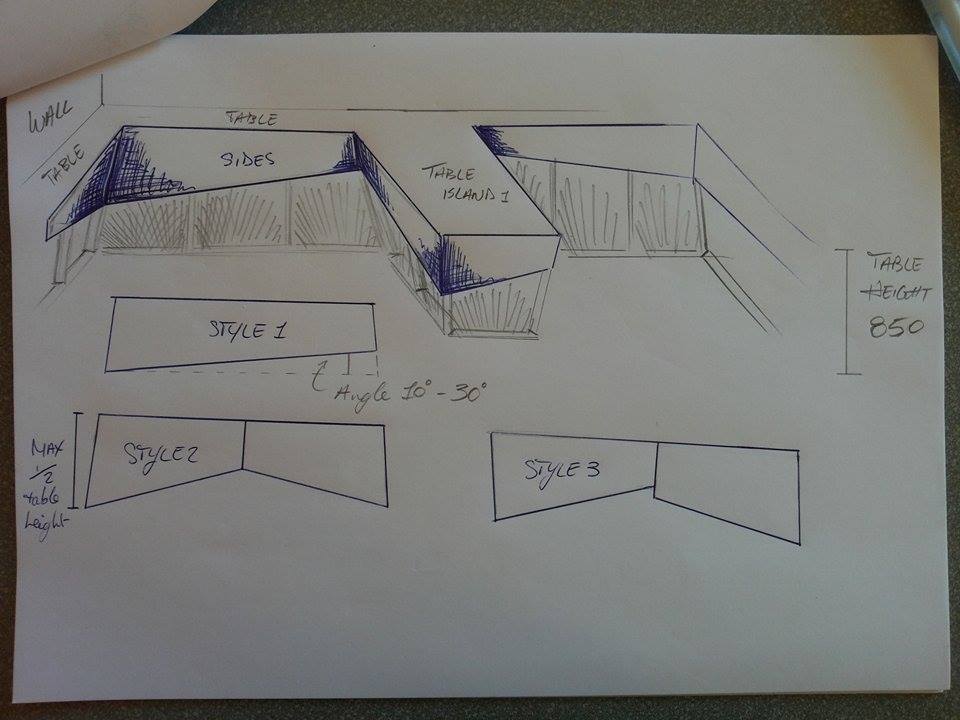
The sketch below shows the area where printed and other objects that are not digital would be displayed. The sketch also defines three ideas to be used as side skirts for the "tables" created.
Finally after all the design had been agreed on and every member understood their job, we started looking into how we are going to place each and every student into the space according to what they were going to present during the exhibition. Below is the first sketch created on the placement of each student. Some minor changes had been applied to accommodate both students and us as a construction team.

building
After a few days waiting for the material to arrive, as soon as we had all material in hand we started to build the frames that would finally build up the actual structure, as seen in the pictures below.


A couple of days later, all the MDF and other wood that had to be cut was transported to my house as to make use of the table saw, as this was the fastest method possible and the cleanest. We also cut some wood for the frames that were going to be used by decoration team to host the wool that would go under the tables. Some wood from the way-finding department was also given to us to be cut using the table saw.


